
What you'll achieve
Customer email arrives in DobroDesk and replies come from your support domain.
Before you start
- Use a domain that is eligible for the DobroDesk custom-domain private beta.
- The signed-in admin receives a sending-check confirmation. That message does not require a reply or verification link.
- Use a workspace owner or admin account in DobroDesk.
Our team currently handles domain setup manually, for domains in the Cloudflare account connected to DobroDesk. Select Get setup help before changing DNS records so we can check eligibility. Automatic connection to your Cloudflare account is not available yet.
Request the support domain
Open Admin > Channels > Support mailboxes and select Another support address.
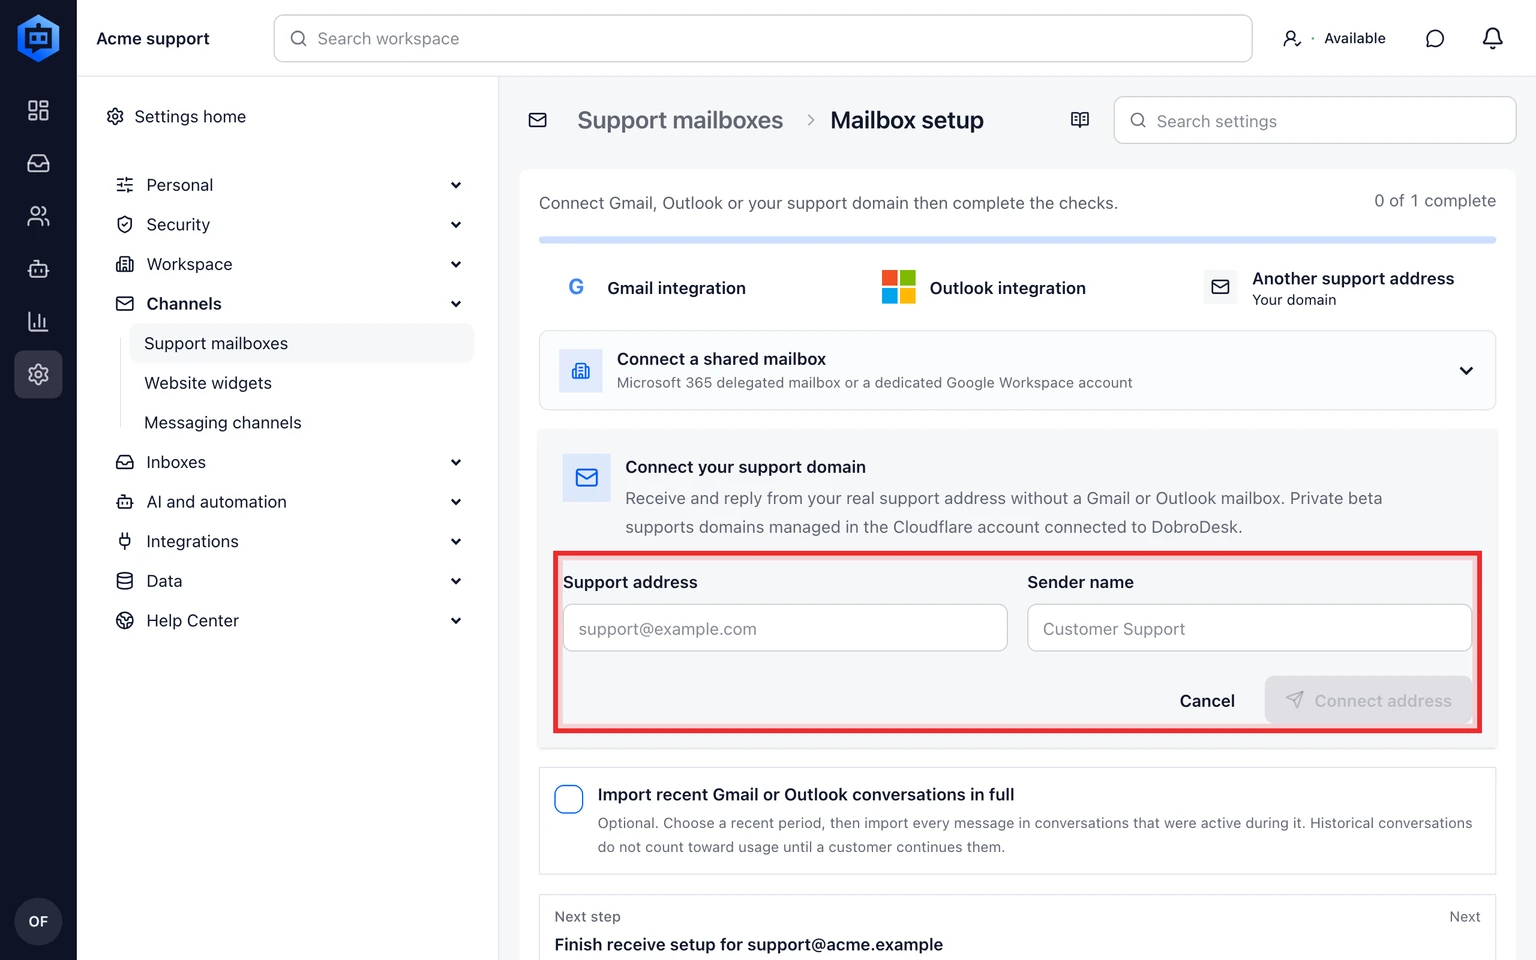
Enter the complete address, for example support@example.com and the sender name customers should see.
Select Connect address. DobroDesk records the domain request without activating email yet.

Wait for domain approval
Add the TXT record shown under Verify your domain, then select Check DNS record. If Cloudflare DNS is confirmed and automatic verification is available, you can approve the record in Cloudflare instead.
DobroDesk checks that the domain can use authenticated sending and incoming routing.
A platform operator assigns the verified domain to your workspace.
Return to the setup when the domain status changes to approved.
Domain ownership verification is separate from email setup. Cloudflare verification appears only after provider activation and is optional. For GoDaddy and other DNS providers, add the displayed record manually. Use Get setup help to arrange mail configuration; ownership confirmation alone does not enable delivery.
Complete both delivery checks
Return to the support address setup and select Check setup.
Confirm that the DobroDesk sending-check message reaches your account. Do not reply to it and do not look for a verification link.
If another provider hosts the support address, forward its incoming mail to the forwarding address shown in mailbox settings.
Send a new message to the support address from an unrelated email account.
Return to the mailbox settings, select Check incoming mail and confirm that Receiving and Sending are ready.
What DobroDesk configures
- Replies use the support address as From and Reply-To.
- In-Reply-To and References keep replies in the customer's existing email thread.
- Outgoing email is signed for the verified domain and delivery failures are recorded in mailbox diagnostics.
- DobroDesk keeps the address inactive if the domain belongs to another workspace or sending verification fails.